The Daring Cardmakers team are getting us to ‘Look Back a Little’ this week.
We want you choose a card from one of the design team’s cards submitted for the 'Foiled' dare and come up with a card using one or two of the same elements. tricky... !
I’ve chosen to use the same Tilda image and a Silver Star, as Lythan used on her foiled card last Friday. It would seem that I’ve also used the same colours as she did too but that was completely unintentional. The colour scheme came about because I wanted to use my Tres Jolie papers from My Mind’s Eye. They are close to being one of my favorites to use because I just love the quality and muted, subtle colours…..they’re so scrummy!
Roberta Robo was pressed into action for this card, as was my large Daisy punch and my water colour pencils.
Plain Card – Aqua Bazzill
Patterned Papers - Tres Jolie - My Mind’s Eye
Tilda Image – courtesy of Lythan (thanks hun)
Blooms – Prima & Sarah’s Cards
Ribbon and Star brad – my stash
Stickles Glitter Glue – Lime Green
Distress Ink – Broken China
I also thought I would have a go with a set of Tanda rubber stamps that I brought a little while back but haven’t used yet. They are the Native American Indian - Set 1 and I was really impressed with the quality of the images.
Here’s one of the cards I made
I coloured the card with distress inks before stamping the image with Black Staz-On.
It was quite a simple card but you should have seen the state of my hands when I’d finished. Lol!
Wednesday, 30 January 2008
Monday, 28 January 2008
Foiled again!
I’m a little late with the Daring Cardmakers dare this week but did manage to get my card finished last night and photographed this morning.
It was Jo’s turn to set the challenge for us:
My dare this week is 'Foiled!' -I would like you to utilise some plain old aluminium (aluminum for our friends across the pond!) foil from your kitchen :). You can scrunch it, die cut it, emboss it, ink it, coil it, cover chipboard - or anything else that you choose!
I decided to have a little go at Dry Embossing this time but to do this I needed quite thick foil so I started by folding my piece into four.
I used an outline Peel-Off as the stencil and embossed first from the front and then the back before colouring with my trusty Twinkling H2O’s.
The background was embossed using a Cuttlebug embossing folder (small bubbles) but I couldn’t do it through my machine because I didn’t want to go over the vase of flowers. Instead I laid my foil over the top of it and embossed by hand using an embossing tool.
The foil was then wrapped around a panel of card, edged with Gold marker pen and then I added some Pink velvet ric-rak to the corners before attaching it to the card with Gold Mini Brads. A strip of velvet ric-rak and a peel off greeting were added and a spot more Gold marker pen around the edges finished off the card.
Saturday, 26 January 2008
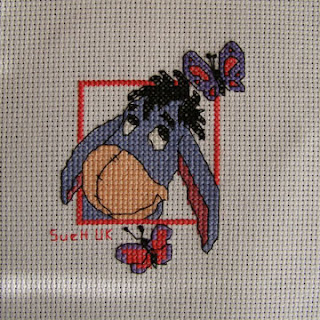
SOLAK - Cross Stitching
Once again the week has just flown by in a flash and I haven’t managed to blog since last Friday.
Tuesday’s Little Extra over at Daring Cardmakers
was intended to be a tutorial from Jo but sadly she was ill (hope you’re feeling better by now hun) and they put in a ‘Tempting Template at the last minute.
I came up with this little card that could either be used as an Anniversary card of even may be as a Valentine’s Day card.
The first thing I did was cover the front of cream card blank with Rhapsody-Euphoria paper from Three Bugs in a Rug. I love this set of papers but unfortunately the colour hasn’t come out very well in the picture.
I cut two strips of cream card and two different sized hearts, stamped all over them using Fluid Chalk Cat’s Eye’s ink pads and my Heart Deco tapestry Stamps and then gave the hearts three layers of Clear UTEE. The hearts and the greeting, which incidentally is a Rub-On that matches the Three Bugs paper, were mounted on the card with 3D foam pads and you’ll have noticed my usual inking around the edges.
I’ve been doing some more charity stitching in the evenings this week for SOLAK
Two more squares for Liridon’s quilt,
Two for Callum’s quilt
And one final one for Annalise
If you have a minute pop over and have a look at some of the wonderful quilts that the girls have put together. I admire anyone who can use a sewing machine the way they do, especially as it’s all for such a fantastic cause.
Friday, 18 January 2008
Hide & Seek
It’s my last Friday as Guest Designer on the Daring Cardmakers team, which is a big shame. I can’t believe those two weeks have flown by so fast but I might still be able to sneak in a Mid Week Little Extra before they kick me off. Lol!
I just wanted to say a big thank you to your girlies for asking me to be a part of your little group……it’s been such fun even thought you managed to find me the hardest dares ever to take part in!
I also want to say a big thank you to everyone who's visited my blog and left lovely messages, it's really kind of you and I do appreciate it.
This week it was Kathy’s turn to set the dare .
I started out with a White linen card and stamped randomly using a Penny Black water colour effect Daisy stamp and a Big and Juicy rainbow ink pad.
Once this was done I attached the torn corner of patterned Vellum over the top before inking the edges of the card.
The mat and paper ribbon were made from glossy card which I’ve daubed with Ranger Alcohol Inks in Stream, Latte, a spot of Gold Mixative and edged with a Sliver Metallic Marker.
Next the Slide Mailer which indecently was hand made.
I brought three of these before Christmas but do you think I could find any of them…..nowhere to be see….grrrrr.
Anyway, once I had bodged one together myself I gave it two or three coats, inside and out with a Ranger Acrylic Dabber in Aqua and then stamped the front with the same daisy as the rest of the card and finished all the edges with the Silver pen.
For the inside of the Slide Mailer I used an Anita’s stamp with Black Staz-On and then painted it with Twinkling H20’s.
The glass slide on the inside was my first attempt at anything like this but I have to say, I was quite pleased with the results.
I used Ranger inks, in the same colours as before to make the background by stamping the applicator randomly over the back of the glass until I was happy with effect and then turned it over and used the Anita stamp again, only this time I just inked the large daisy part of the stamp with Black Staz-On.
I painted this with H2O’s mixed with a little of the solution that allows you to paint onto Acetate or glass before finally popping the slide into the silver frame with a piece of white card behind it to help the colours show up more and topping it off with a little bow of Lavender sheer ribbon.
The front of the card was finished off with Lavender sheer ribbon, flowers, brads and eyelets, all from my stash and the Daisy, Daisy was cut on my Cuttlebug using ‘Ginger’ Quickuts and Sizzix Skittle Dee De Alphabets.
I just wanted to say a big thank you to your girlies for asking me to be a part of your little group……it’s been such fun even thought you managed to find me the hardest dares ever to take part in!
I also want to say a big thank you to everyone who's visited my blog and left lovely messages, it's really kind of you and I do appreciate it.
This week it was Kathy’s turn to set the dare .
Okay, for my dare we're heading to the playground for a game of
Hide & Seek
I'd like you to make a card which has a hidden component of some sort - the hidden part could be a tag, a concealed photo, message or something along those lines, maybe a pull-out or pop-up. Anything goes as long as there's something extra for the recipient to find on your card that's not immediately visible when they open the envelope.
Here’s the card that I came up with
And this is what’s hidden inside
I started out with a White linen card and stamped randomly using a Penny Black water colour effect Daisy stamp and a Big and Juicy rainbow ink pad.
Once this was done I attached the torn corner of patterned Vellum over the top before inking the edges of the card.
The mat and paper ribbon were made from glossy card which I’ve daubed with Ranger Alcohol Inks in Stream, Latte, a spot of Gold Mixative and edged with a Sliver Metallic Marker.
Next the Slide Mailer which indecently was hand made.
I brought three of these before Christmas but do you think I could find any of them…..nowhere to be see….grrrrr.
Anyway, once I had bodged one together myself I gave it two or three coats, inside and out with a Ranger Acrylic Dabber in Aqua and then stamped the front with the same daisy as the rest of the card and finished all the edges with the Silver pen.
For the inside of the Slide Mailer I used an Anita’s stamp with Black Staz-On and then painted it with Twinkling H20’s.
The glass slide on the inside was my first attempt at anything like this but I have to say, I was quite pleased with the results.
I used Ranger inks, in the same colours as before to make the background by stamping the applicator randomly over the back of the glass until I was happy with effect and then turned it over and used the Anita stamp again, only this time I just inked the large daisy part of the stamp with Black Staz-On.
I painted this with H2O’s mixed with a little of the solution that allows you to paint onto Acetate or glass before finally popping the slide into the silver frame with a piece of white card behind it to help the colours show up more and topping it off with a little bow of Lavender sheer ribbon.
The front of the card was finished off with Lavender sheer ribbon, flowers, brads and eyelets, all from my stash and the Daisy, Daisy was cut on my Cuttlebug using ‘Ginger’ Quickuts and Sizzix Skittle Dee De Alphabets.
Tuesday, 15 January 2008
Lookie, Likies
Yep lookie likies, that’s what we’re playing over at the Daring Cardmakers today for the mid week little extra and that Jane has set us another stinker of a dare.
Now, as you are probably aware, both Lynne and Gillian sadly stepped down from the Design team recently, and all though the DCM team's door is always open for them, we thought it would be nice to pay a little tribute to them in appreciation for all their wonderful work during their time on the DCM design team. Lythan came up with an idea that we make a card in the 'style' of either Lynne or Gillian's cards. Or maybe pick your favorite of theirs and use an element from their cards on your own card. Everyone has their own style- we thought it might be a little challenge to try out a different style for a change!
You’d think it was easy trying to emulate someone else’s style of card making wouldn’t you but I found this so hard you wouldn’t believe.
I chose to have a go at Gillian’s style but the first obstacle I had to overcome was the fact that she seems to use a lot of what I term ‘Artsy’ type rubber stamps. Now I have a fair sized collection of rubber stamps but not one single stamp in this style (if you don’t take into account a Christmas set that I didn’t want to use) so I had to find a way of overcoming this little glitch. Eventually I solved the problem with a bit of surfing and found a set of lovely tag in just the right style to download and print out.
There’s a small heart on one of the tags so I decided to go down the romantic route and went searching again for the words to the Shakespeare sonnet ‘Shall I compare thee to a summer’s day?’ and printed this out in a script font onto cream parchment paper.
Next came the fun bit……..I went mad with my Tim Holtz Distress Inks in shades of Tattered Rose, Vintage Photo, Antique Linen and Dried Marigold on the card, tags and the parchment and having spritzed the whole lot with water I added a few coffee granules to the parchment to distress it even further. When everything was dry I added a little Diamond Glaze to the heart for added definition.
I then had to blow the dust and cobwebs off my sewing machine.
It’s lucky to see the light of day from one year to the next is my sewing machine but as machine stitching seems to feature in quite a lot of Gillian’s cards it was a must. Two very wobbly rows of stitching later and the parchment is attached to the card.
Next I needed something to tie my tags to and what better than a piece of Maya Road Chip Board which I covered in Brown Staz-On and secured with an antique looking brad from my stash. The sheer ribbon and metal photo were also from my stash.
All that was left for me to do then was print out the first line of the sonnet in a different font, cut them up and add then to the front of the card………and there you have it…a card that looks nothing like the cards that Gillian makes. Lol!
Monday, 14 January 2008
Sometimes it’s the littlest things that make the biggest difference.
As you may know, I just love to cross stitch and just recently, thanks to a very good friend, I was pointed in the direction of a wonderful group of ladies who stitch for charity.
The group is called SOLAK which stands for Stitches Of Love And Kindness.
They are a non-profit making organisation that was launched back in April 2001 with the intention of making lap quilts for people with long-term illnesses. As time has gone on the membership has grown to include stitchers and quilters from all over the world and I’m very pleased to report that I’m one of their newest members.
The way it works is that people make requests for quilts or cushion and tell us what they would like to be incorporated into it, as in flowers, teddies and the like. It’s then posted on the board and we decide which current projects we want to stitch for, stitch the appropriate squares and then send them to the person doing the quilting. Then, when it’s all finished the gift is sent to the recipient.
I’ve just finished my first two squares for a quilt that has a theme of Flags and American cars and they will be winging their way to my good friend Nicki out in Switzerland very soon to be made up.
Off to see what else I can stitch now!
If anyone has an hour or two to spare and is interested in stitching or quilting for this charity, I’m sure they would be grateful for your help. There’s never any pressure about how much or how little you do and after all it’s all for a good cause so why not give it a go.
You’ll find more info here if you’re interested.
Friday, 11 January 2008
Excited or what!
I can’t tell you how excited I am this week, and to say I’m over the moon is in no way an exaggeration.
I was so thrilled last week when I received an email from the lovely Lythan asking me to be a guest on the design team for Daring Cardmakers
for the next two weeks…..how cool is that……..I just hope I can do them justice.
Jane set the dare this week entitled Me and my Shadow.
I want you to create not just one but TWO cards! But wait........there's more! I want both cards to contain the same embellishments and papers, ribbons etc- but arranged in a different way for a different occasion....the only thing being different is the wording....I'll let you have different wording ! (How nice of me eh?) I'm well aware this is a really hard challenge, and that I have thrown everyone into 2008 off the deep end....but go on- give it a go - I DARE YOU !
Now I don’t know about you but usually when I make my cards I have some of idea of what I’m about to make and the papers and embellishments are chosen with that in mind. In this instance I had no idea what I was about to make so I just sorted through my stash, got together a few things that I thought would go together and true to my recent form sat pushing them round the table for quite some time before eventually coming up with something that looked passable.
The real challenge came trying to make the second card look totally different but hey, I guess that’s what Daring Cardmakeres is all about, isn’t it!
Anyway, I eventually managed it and without further ado here they are.
It might look as if I've not used both the papers on the second card but I have, honest. I've just cut out the flowers from the red paper and used them on their own.
Here’s a little list of the components that went into my cards:
Cream Hammered card stock – Craft Creations.
Paper – Daisy D’s Chasing Butterflies collection
Ribbon – Little Silver Hat
Tilda Rubber stamped image – curtsey of Lythan (when she came over to play)
Happy Birthday – Clear Choice Stamps
Also from my stash
Large Brad
Red and Blue Stickles Glitter Glue
Gold Metallic Pen
Water colour pencils
Computer Font – abc kids
Wednesday, 9 January 2008
Ever had one of those days...............
.........when you push your craft stash round and round the table but never seem to produce anything that looks in the least bit passable.
Will I'm having one of those today and I'd hate to tell you just how many half finished cards have ended up in the recycle pile.
I did eventually finished two cards for the Little Extra over at Daring Cardmakers though.
Carrying on from Fridays dare we had to make a card using some of the new things we had for Christmas.
I've made two Valentine Day cards using my new Heart Deco set of Tapestry stamps, two different Cuttlebug Embossing Folders, Cuttlebug Vintage corner die and the Sizzlits Love with Hearts decorative strip, all of which Santa brought for me.
I'm also pleased to report that my knee is well on the mend.
Thanks to everyone who left messages (and those that just laughed to themselves at the thought of me hobbling around. lol) Your good vibes seem to have done the trick, the swelling has gone down quite a bit and I can bend it now.
Monday, 7 January 2008
Just Call Me Hop-a-Long!
I’m feeling so fed up with myself at the moment because I can’t get about very well.
It all stems back to an op I had on my Right knee over 20 years ago and every now and then it swells up for no apparent reason. It had been feeling a bit odd (numb) since the start of last week and as the week went on it steadily got worse.
Patterned paper and Blue card – DCWV Baby Scrapbook Kit in a Stack
Baby - Cuttlebug Embossing Folder
Ribbons & Ric-Rac
Large & Mini Brads
Stickles Glitter Glue
It all stems back to an op I had on my Right knee over 20 years ago and every now and then it swells up for no apparent reason. It had been feeling a bit odd (numb) since the start of last week and as the week went on it steadily got worse.
I guess I didn’t help matters by limping my round the sales last Thursday looking for new shoes and by Friday I was unable to bend it at all. To add to the the problem I also had constant cramp in my calf because of the way I had been walking and to top off it started the pain in my hip off again, so since Friday I’ve been able to do very little, other than sit with my leg up and pop Ibuprofen tablets to reduce the swelling.
I eventually managed to get to the doctors this morning and he thinks it’s more likely to do with the ligaments rather than my old problem but said I should keep on with the tablets.
The good news is that I can at least bend it a little bit now and have been able to sit at my craft table today and have play.
Lynne has set the first dare of 2008 for the Daring Cardmakers team and she wants us to make a card celebrating ‘New’ so I decided to do a New Baby card.
While I was sitting with my feet up I used the time to stitch a few panels using ‘Form-a-Line' templates from Card Inspirations. I love doing these and have collected quite a few of them over the years. I've used a Teddy Bear for my card.
What I’ve used
Patterned paper and Blue card – DCWV Baby Scrapbook Kit in a Stack
Baby - Cuttlebug Embossing Folder
Ribbons & Ric-Rac
Large & Mini Brads
Stickles Glitter Glue
Subscribe to:
Posts (Atom)